Setting up your Corporategift.com SSO account?
You can use Microsoft Azure as the identity provider (IdP) for your enterprise users to sign in to corporategift.com via SSO with their Microsoft username and password.
Single Sign-On (SSO) brings the most secure access to Corporategift.com without the need of the corporategift sign in process, and authenticating with your enterprise's Azure account.
Every time you access Corporategift.com as an SSO user, it automatically reroutes you securely to Azure, and then after authentication, it routes you back to your corporategift.com account as a signed in user.
SSO uses the secure SAML 2.0 protocol to delegate the entire authentication process to Azure.
Prerequisites:
To configure SSO, you need:
- An Azure account with an active subscription.
- One of the following roles: Global Administrator, Cloud Application Administrator, Application Administrator, or owner of the service principal.
- Completion of the steps in Quickstart: Create and assign a user account.
Enable single sign-on:
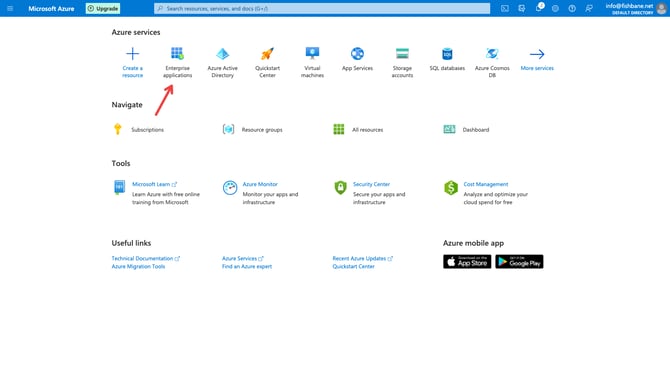
- You need to login at: https://portal.azure.com/
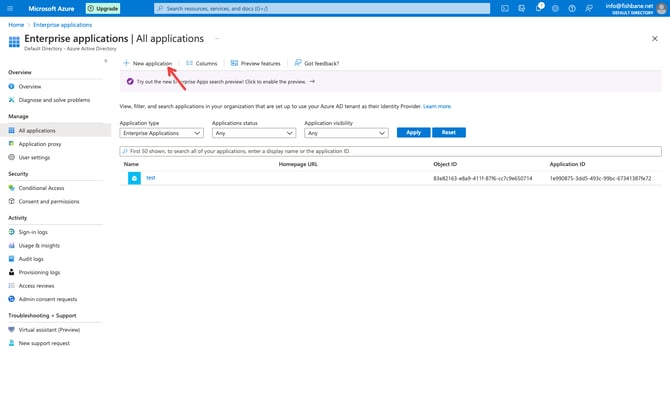
- Go to Enterprise applications.
- Click New application.
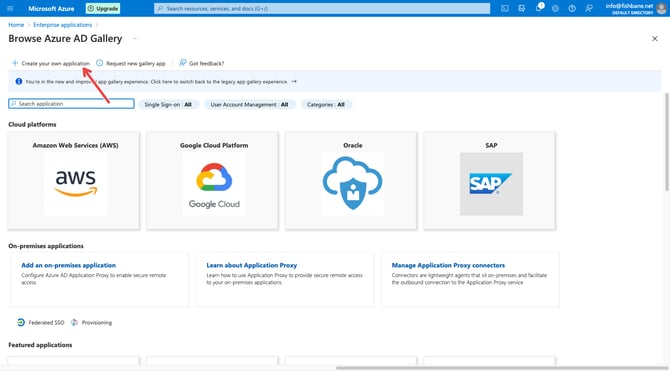
- Click Create your own application.
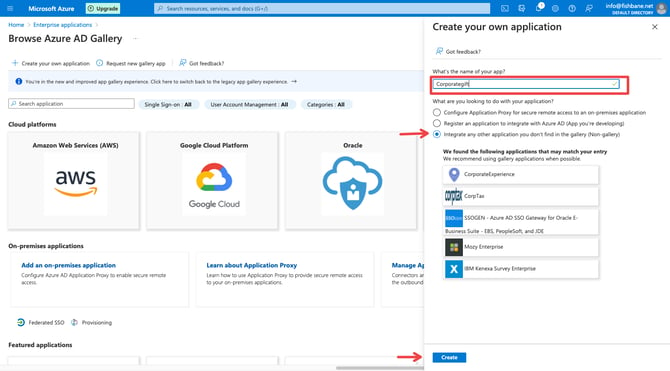
- Enter the SAML application details:
- Application name: "Corporategift".
- Choose “Integrate any other application you dont find in the gallery (Non-gallery)".
- Click Create
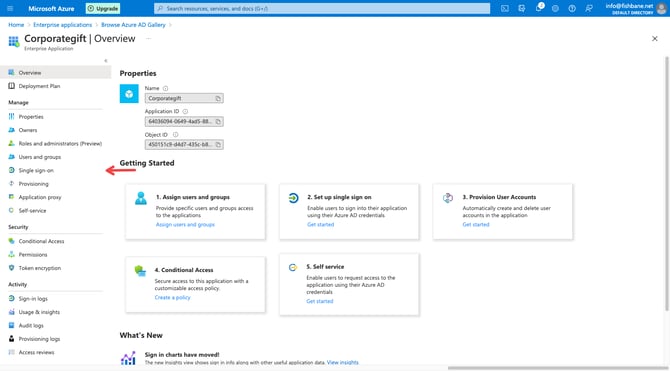
- You will be redirected to the Corporategift application main page. You will now need to click Single-sign on.
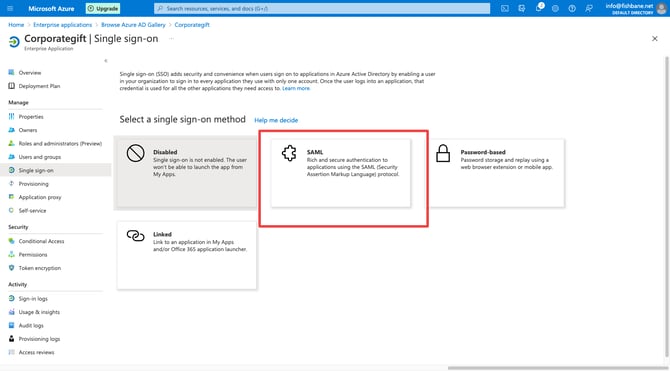
- In the next screen choose SAML method
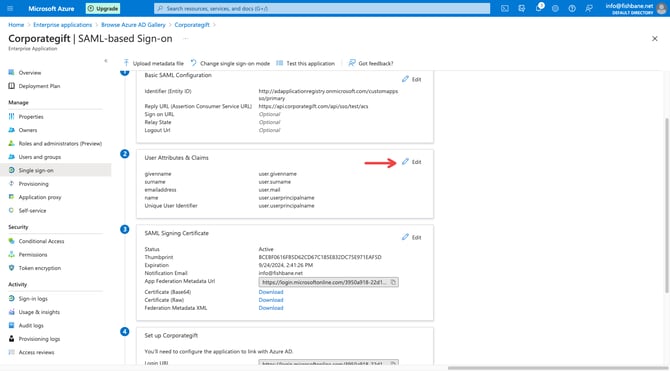
- Next we need to go through the setup SAML steps, Click Edit on the "Basic SAML Configuration" step:

- Get the Identifier (Entity ID) field and the the Reply URL:
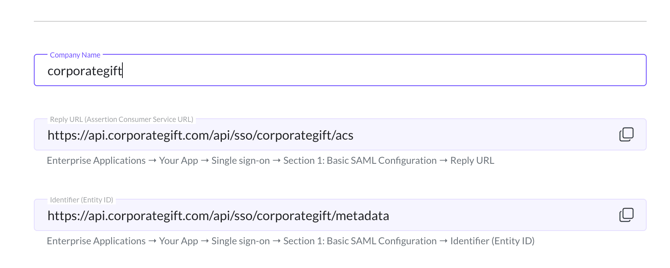
- login to your corporategift.com account (you must be an account owner or a super admin), and navigate to the my integrations section: https://account.corporategift.com/my-integrations/
- Click on the SSO tab, select Microsoft Azure and click "Add"
- enter you company name in the company name field remove spaces and kip and convert all letters to lowercase
- copy the the Identifier (Entity ID) field and the the Reply URL
- Fill the configuration details as bellow:
-
- In Identifier (Entity ID) field add the identifier url you copied in the previous step :
make sure it matches what you see in the SSO settings on corporategift (should end with "metadata" - Remove this first auto added option. (the one starting with "http://asapplicationregistery...")
- In the Reply URL section add the Reply URL you copied in the previous step :
make sure it matches what you see in the SSO settings on corporategift (should end with "acs"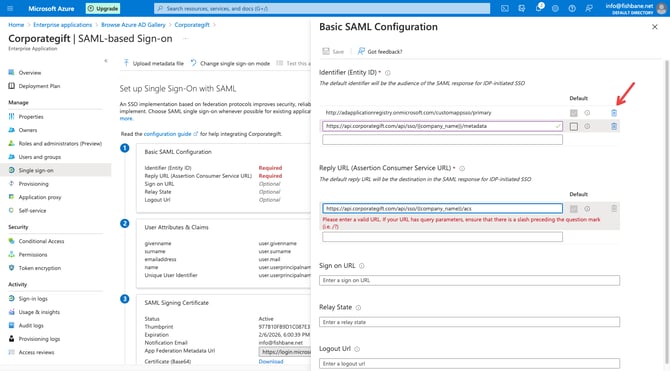
- Save.
- In Identifier (Entity ID) field add the identifier url you copied in the previous step :
- Now we need to edit the User Attributes & Claims section:
- Click Edit:
- Click on Unique User Identifier
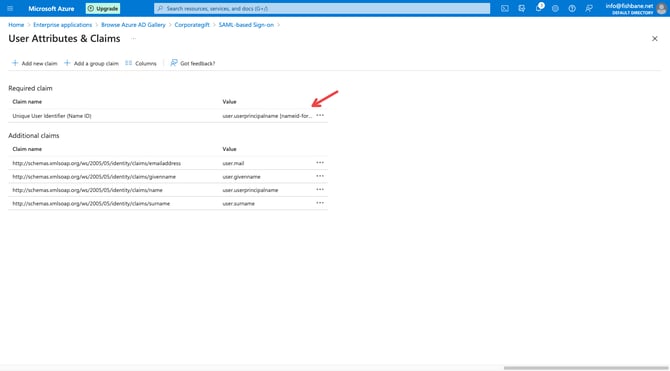
- Change the "Name identifier format" to Default and the "Source attribute" to user.userprincipalname.
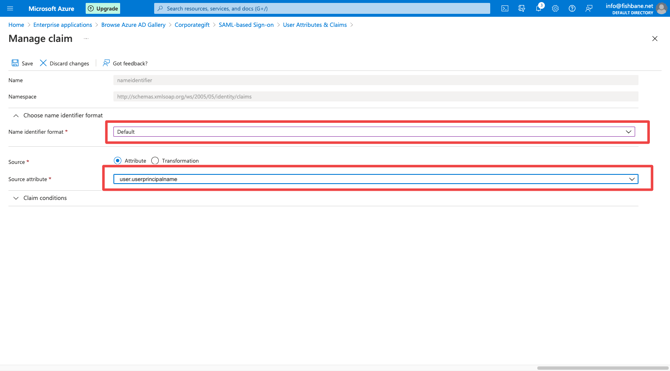
- Save it.
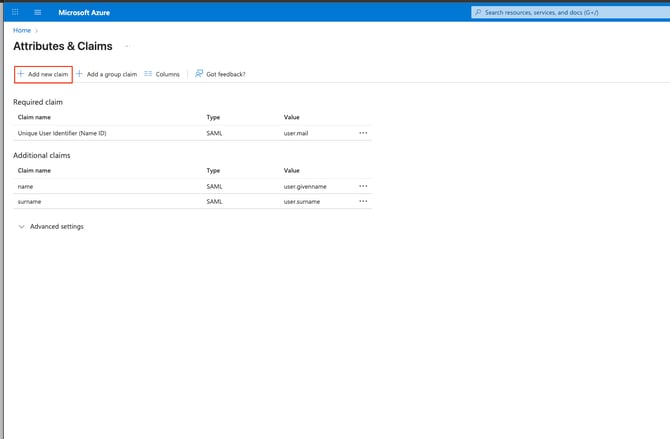
- Next we will make some more changes to the Additional claims section:
- Delete rows data:
- emailaddress
- givenname
.png?width=670&height=266&name=unnamed%20(11).png)
- change the following rows:
replace - "https://schemas.xmlsoap.org/ws/2005/05/identity/claims/name" to "name" and its value to "user.givername"
Finally it should looks like this:
replace - "https://schemas.xmlsoap.org/ws/2005/05/identity/claims/surname" to "surname" and its value to "user.surname"
.png?width=670&height=266&name=unnamed%20(12).png)
- Delete rows data:
-
I you would like to send also the user's Department, if the user needs to be assigned in Corporategift.com to a specific department (ex. sales/marketing)- Add new department attribute:
- Click on Add new claim
- - Set name to department
- set source attribute to user.department
- save it.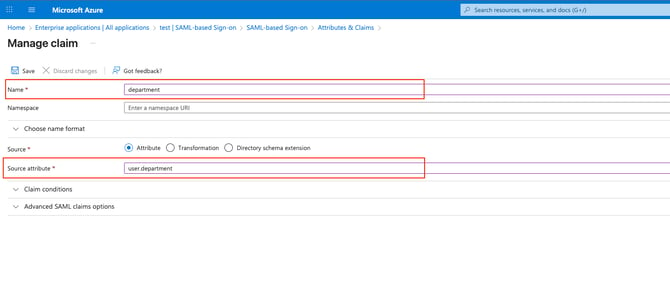
- Click on Add new claim
- Add new department attribute:
- Click Edit:
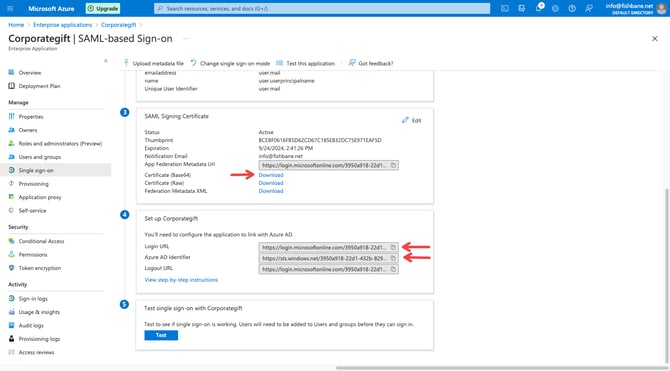
- Last step is to copy the required data and email it your account success manager so corporategift.com can complete the setup and configure the SSO:
- Copy Login URL and Azure AD Identifier from step 4.
- Download the Certificate (Base64) in SAML Signing Certificate section
- add the Login URL, Azure AD Identifier and the Certificate and in the my integrations section (from step 9) - and continue to configure the SSO on the corporategift.com account.
That's it, once your SSO is finalized on corporategift side you are ready to go.
12. Once the app is confirmed, go to Azure Active Directory > Enterprise Applications, and select the application you registered for SSO.
- Under Properties, toggle Visible to users to yes.
- Under "User and Groups" Assign users groups to be able to use the SSO
- Now the app can be added to a Collection for My Apps page for Azure Initiated Login.

Enjoy Gifting!