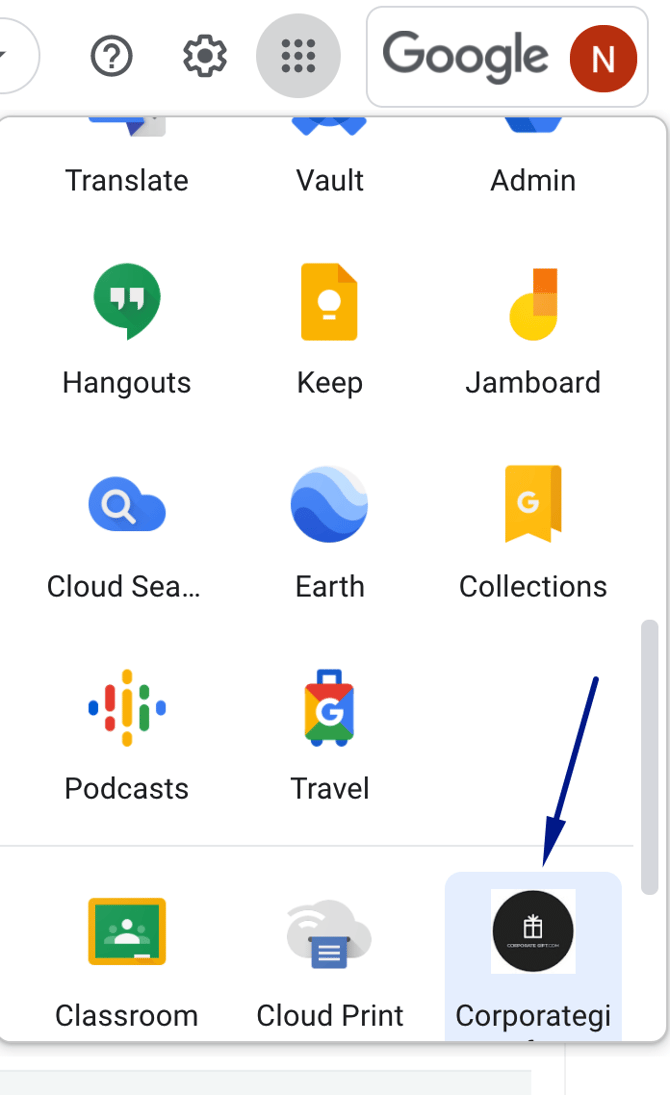
Setting up your Corporategift.com SSO account?
Before You Begin
- Super Admin access to CorporateGift
- Google Workspace Administrator access
- A verified Google Workspace domain
Step 1 – Create the Google SSO Integration in CorporateGift
Navigate to My Integrations → SSO.
Locate Google Workspace SSO and click Add.
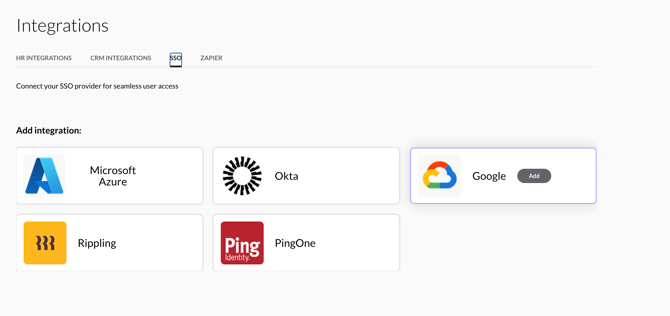
Figure: Step 1 – Create the Google SSO Integration in CorporateGift
Step 2 – Configure Authentication
Choose Login Only or Just-in-Time (JIT) user provisioning.
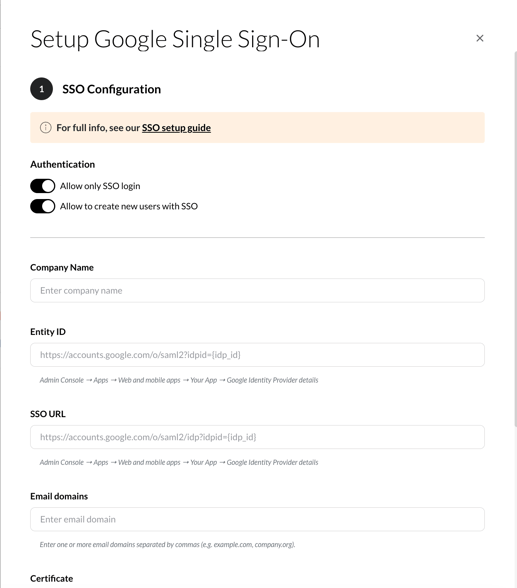
Figure: Step 2 – Configure Authentication
Step 3 – Enter Your Company Name
Enter a lowercase company name (no spaces). Copy the generated ACS URL and Audience URI into Google Workspace.
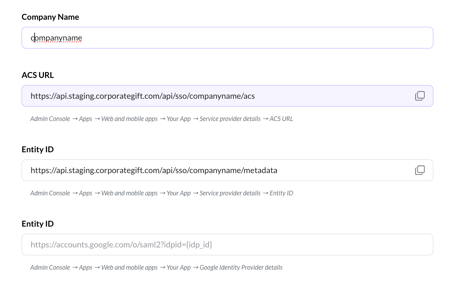
Step 4 – Configure the SAML App in Google Worksapce
Where to find SAML Apps in Google:
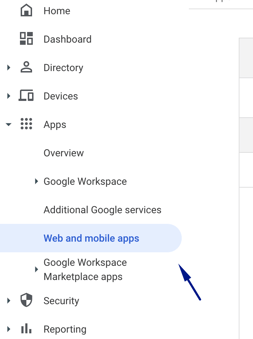
As an administrator on your Google account, go to the admin portal and click through to Apps > Web and mobile apps
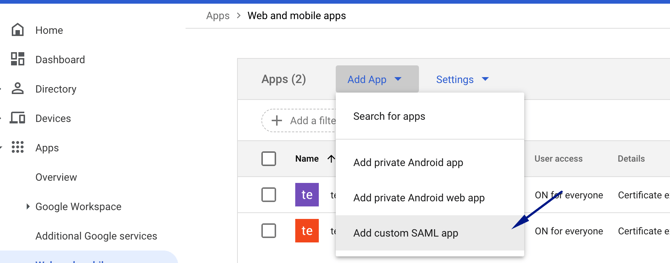
Click "Add App-> Add Custom SAML app"
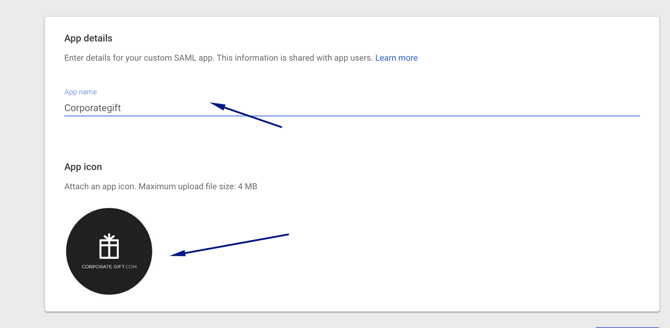
In the app details, name it "Corporategift" and add our logo (you can take it from here, right click and Save as):

Click Continue.
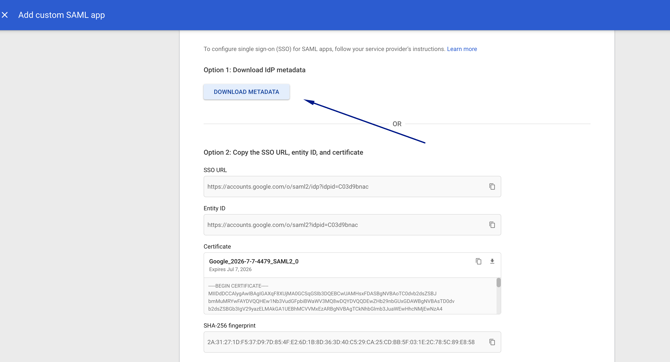
On the next page, click Download metadata.
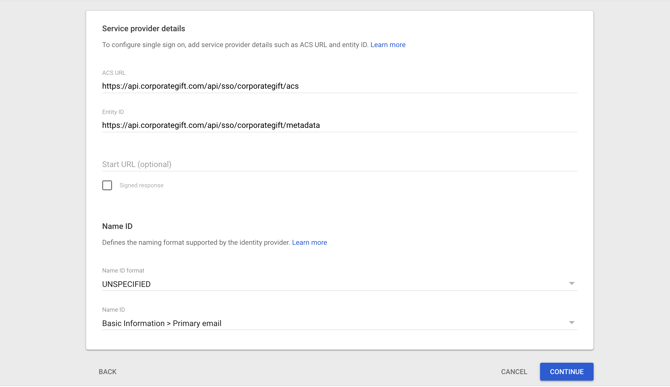
In the Service provider details step, add the following:
ACS URL:
Paste the ACS URL copied in step 3
(notice the structure should be like this: https://api.corporategift.com/api/sso/[your Company name with no spaces and lower case]/acs)
Entity ID:
Paste the Entity ID copied in step 3
(notice the structure should be like this: https://api.corporategift.com/api/sso/[your Company name with no spaces and lower case]/metadata)
Example:
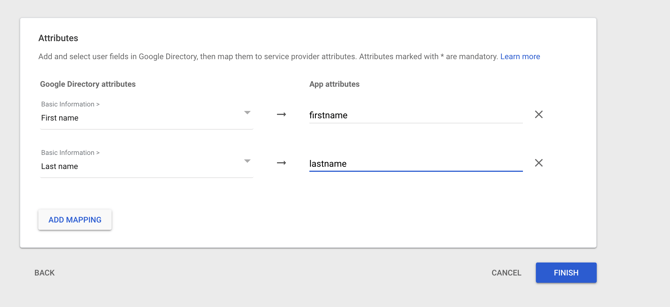
Next, add mapping (optional). This will help us identify users.
Please add first name (firstname) and last name (lastname) as shown in the screenshot below:
Click Finish.
Step 5 – Complete the Configuration
Open the metadata downloaded in step 4. Copy and Paste the Identity Provider Issuer, Single Sign-On URL and X.509 Certificate from Google Workspace into CorporateGift.
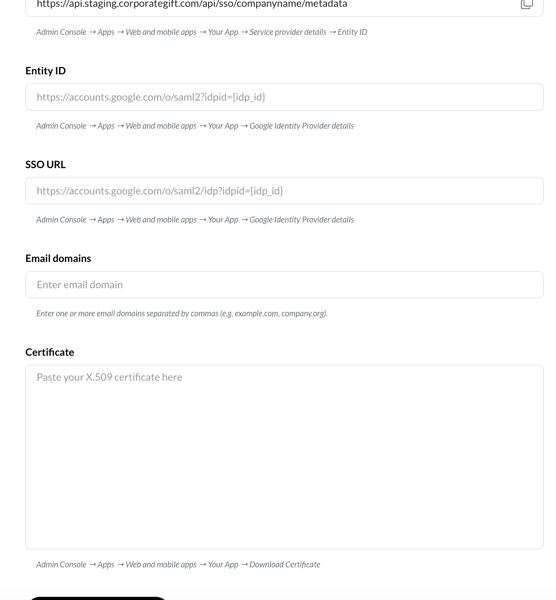
click continue
Step 6 – Configure Automatic User Provisioning
Choose whether all new users receive the same permissions or are configured by department.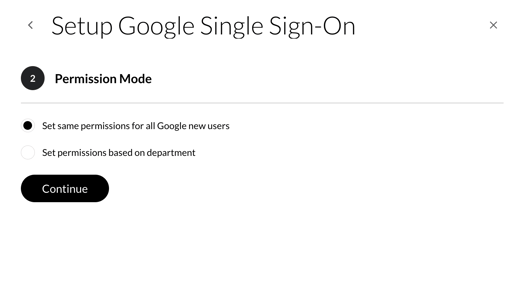
Option 1 – Same Permissions for All Users
Choose:
Set same permissions for all Google new users
Every newly created user will receive the same configuration
Configure:
- User Role
- Tags
- Categories
- Campaign access
- Budget Entities
- Inventory Items
- Approver
- Spend Limits
Every new user created through Google will receive these settings.
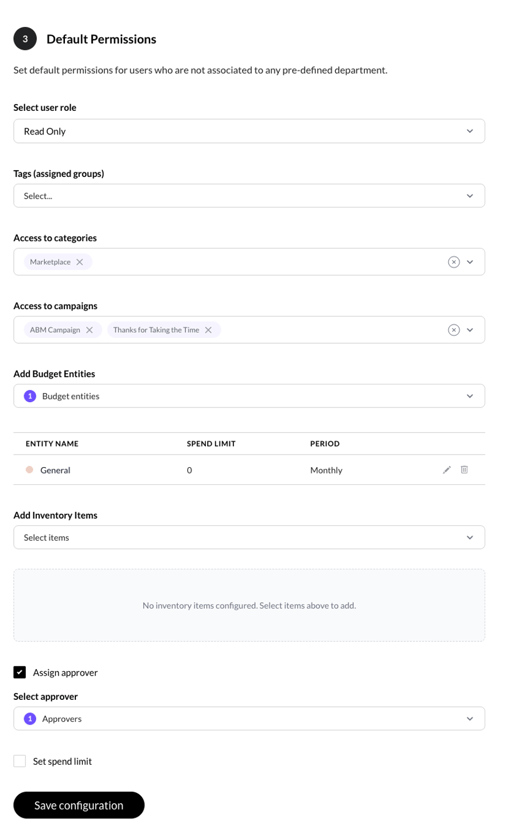
Figure: Step 6 – Configure Automatic User Provisioning
Option 2 – Permissions Based on Department
Choose:
Set permissions based on department
This option allows different departments to receive different permissions automatically.
Map Departments
For each department:
- Enter the department name exactly as it appears in Google.
- Select the CorporateGift Tag that should be assigned.
- Click Add.
Example:
| Azure Department | CorporateGift Tag |
|---|---|
| Sales | Sales |
| Marketing | Marketing |
| HR | Human Resources |
Important
Department names must exactly match the values sent by Google.
Map Google Workspace department values to CorporateGift tags and configure permissions.
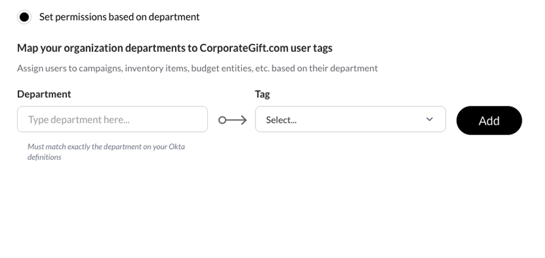
Configure Permissions
For every department mapping, configure:
- User Role
- Tags
- Categories
- Campaign Access
- Budget Entities
- Inventory
- Approver
- Spend Limits
Each department can have its own permission set.
You're Done
You should see the green "Installed" label
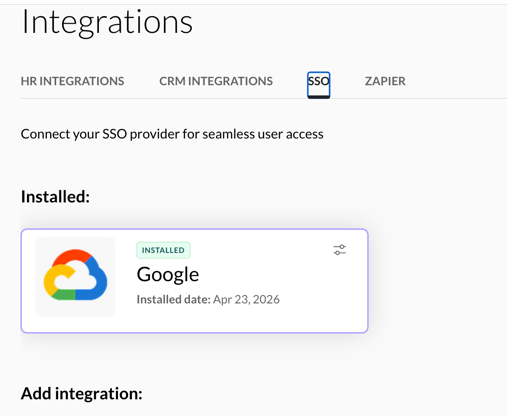
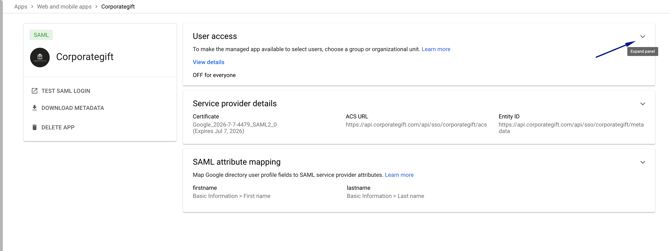
Once you confirmed the SSO has been properly set up from the corporategift.com side, please test the app by clicking Test SAML login.
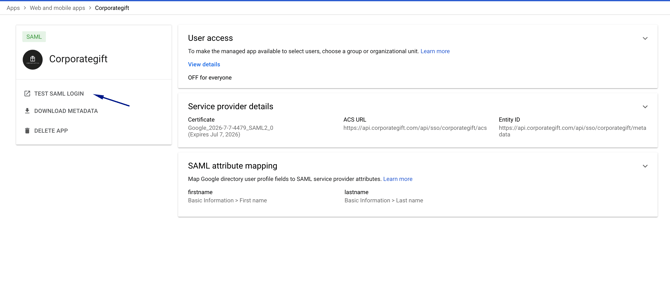
If its working properly, please change app access to be visible to all by clicking on the expand arrow here:
Change access to On to everyone and save
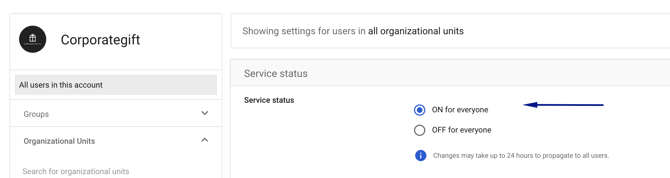
Now every user that has access to your CG Elite account can log in from their Google account by clicking on the Corporategift.com app icon :